Unlock the Secret to Flawless Press-On Nails: Transform Your Look Today!
In recent years, press-on artificial nails have taken the beauty world by storm, becoming a staple for those looking to enhance their style without the commitment of traditional nail treatments. These easy-to-use, versatile nail solutions offer a plethora of designs and colors that can elevate any look in a matter of minutes. Whether you’re preparing for a special occasion or simply want to switch up your everyday style, press-on nails provide an accessible and affordable alternative to salon visits. In this article, we’ll delve into the numerous benefits of press-on nails, share step-by-step application techniques for achieving a professional finish at home, and discuss essential maintenance tips to ensure your press-ons last as long as possible.
Benefits of Press-On Artificial Nails
One of the primary advantages of using press-on nails is their ease of application. Unlike traditional acrylic or gel nails, which require time-consuming visits to the nail salon, press-ons can be applied quickly at home. This convenience is particularly appealing for those with busy lifestyles or those who simply want to avoid the hassle of booking appointments. Additionally, press-on nails are cost-effective, often negating the need for frequent salon trips that can add up over time. With a wide variety of styles available, from simple and elegant to bold and colorful, these nails allow for effortless self-expression. I have a friend who loves to switch her nails according to her mood and outfits—one day, she’ll sport a classic French manicure, and the next, she’ll flaunt vibrant floral designs—making press-ons her go-to choice. The ability to change styles quickly means you can always have the perfect nails for any occasion.
Application Techniques for Flawless Press-On Nails
To achieve the best results when applying press-on nails, it’s essential to follow a systematic approach. First, proper preparation of your natural nails is key. Start by cleaning your nails thoroughly to remove any oils or residues. Next, trim and buff your nails to create a smooth surface; this ensures that the press-ons adhere better and look more natural. Selecting the right size of press-on nails is also crucial—each nail should fit snugly without overlapping onto your skin. When you’re ready to apply, it can be helpful to use a nail adhesive for added security, though many press-ons come with adhesive tabs. Align the press-on with your natural nail and press down firmly for a few seconds to ensure a secure fit. This method not only guarantees a flawless finish but also enhances the longevity of your nails.
Preparation Steps
Begin by removing any existing nail polish and thoroughly washing your hands. Use a nail file to shape your natural nails and trim them as necessary. Buff the surface of each nail gently to create a rough texture that helps the adhesive bond better. Finally, push back your cuticles with a cuticle pusher or a soft cloth to ensure the press-ons sit beautifully at the base of your nails.
Application Steps
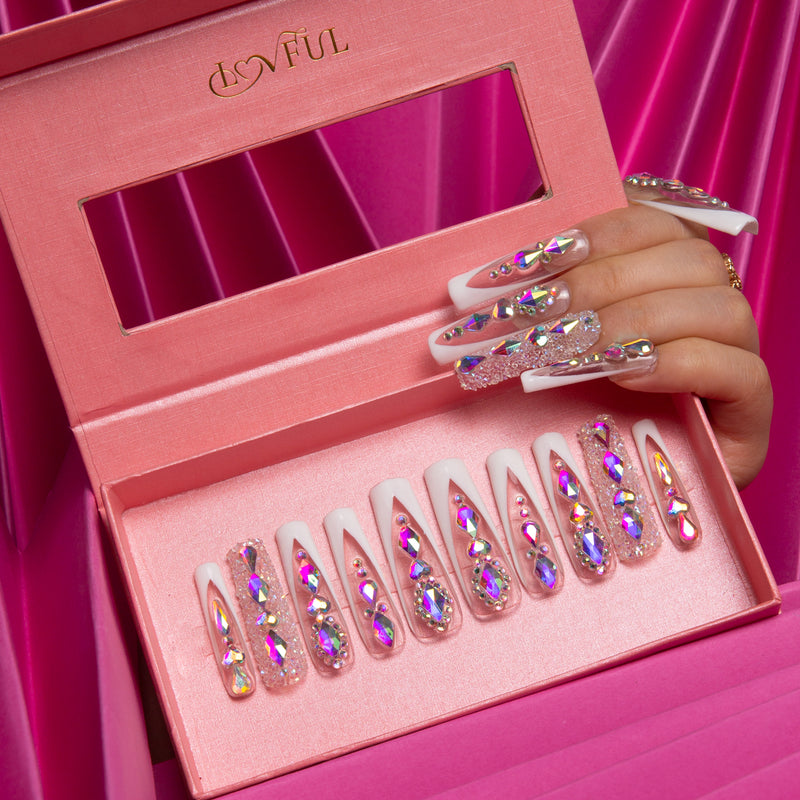
Once your nails are prepped, it’s time to apply the press-ons. Start by selecting the appropriate sizes for each finger. If using adhesive tabs, peel them off and place them on the back of the press-on nails. Align the press-on with your natural nail, pressing firmly in the center and then working your way to the edges. For a more secure fit, consider applying a dab of nail glue to the base before pressing down. Hold the nail in place for about 10 seconds, allowing the adhesive to set properly. Repeat this process for each finger, ensuring that you achieve a cohesive look across both hands.
Maintenance and Care for Longevity
To extend the life of your press-on nails, proper care is essential. Avoid exposing your nails to excessive water or harsh chemicals, as these can weaken the adhesive and cause the nails to lift. When cleaning or washing dishes, wearing gloves can help protect your nails. If you notice any lifting, gently press down the edges to re-secure them. When it's time to remove your press-ons, do so carefully to avoid damaging your natural nails. Soak your nails in warm, soapy water for a few minutes, which can help loosen the adhesive. Then, gently lift the press-ons starting from the edges. If you encounter any resistance, do not force them off; instead, soak them for a little longer. It’s also a good idea to give your natural nails a break between applications to allow them to breathe and recover.
Elevate Your Style with Press-On Nails
In summary, press-on artificial nails offer an incredible solution for those seeking stylish, affordable, and versatile nail options. With their ease of use, quick application methods, and minimal maintenance requirements, they are perfect for anyone looking to elevate their beauty routine. As you experiment with different styles and techniques, you’ll discover how press-on nails can transform not only your hands but also your confidence. So why not give them a try? Embrace the fun and creativity that comes with wearing press-on nails and enjoy the transformation they bring to your look!