Transform Your Space: Unleash the Magic of Studio Lights!
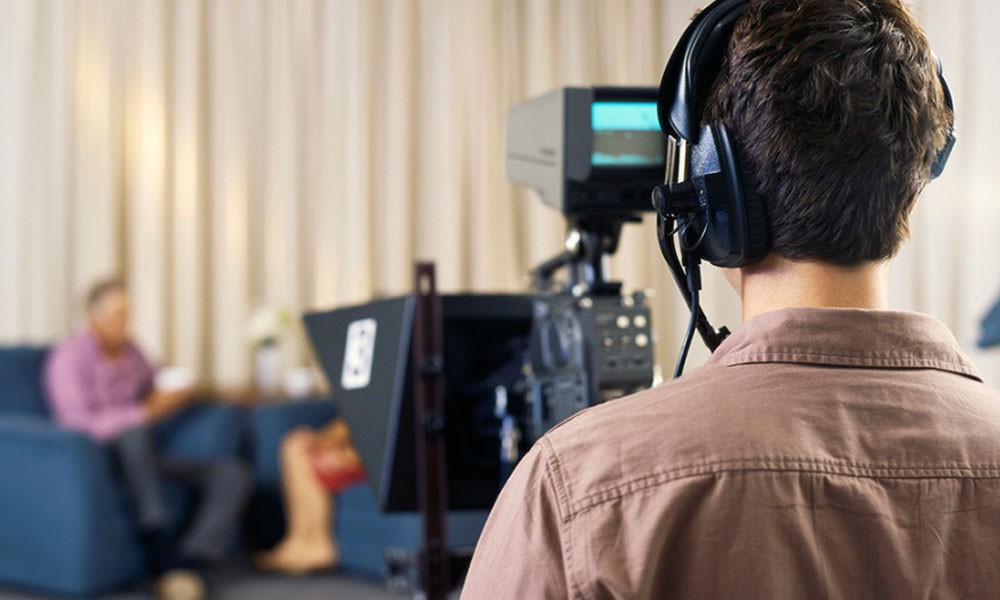
Lighting is one of the most crucial elements in any space, whether it’s a professional studio or your cozy living room. Studio lights can completely transform a space, enhancing not only the aesthetic but also the functionality of the environment. They bring warmth, create ambiance, and highlight the details that matter. I remember when my friend Sarah decided to set up her own home studio for photography. She invested in a few studio lights, and the difference was astounding—her photos went from average to breathtaking in no time.
In both home and professional settings, the importance of quality lighting cannot be overstated. Proper lighting can influence how we feel in a space, affecting everything from our mood to our productivity. Whether you're a photographer, a videographer, or just someone looking to elevate your home environment, understanding and utilizing studio lights is essential. The right lighting helps you capture the perfect moment, elicits the right emotions, and creates an inviting atmosphere.
Understanding Studio Lights
Studio lights are specialized lighting equipment designed to provide controlled lighting for photography and videography. They come in various types, including LED lights, softboxes, and ring lights, each serving a unique purpose. LED lights are popular for their energy efficiency and versatility, while softboxes diffuse light to create soft, even illumination that reduces harsh shadows. Ring lights, on the other hand, provide a uniform light source that is especially flattering for portrait photography.
The primary purpose of studio lights is to enhance the quality of images and videos. When used correctly, they can help achieve the desired mood and effect, making them indispensable tools for professionals and enthusiasts alike. In my experience, using these lights can completely change the dynamics of a shoot—what might have been a dull, uninspired image can become a striking masterpiece with the right lighting setup.
Benefits of Using Studio Lights
Incorporating studio lights into your space offers numerous advantages. Firstly, they significantly improve image quality. Good lighting can make the difference between a poorly exposed photo and a stunning one, allowing you to showcase your subjects in the best possible light. Studio lights also enable you to create different moods and atmospheres by adjusting the intensity and color of the light. For instance, a warm, soft light can evoke feelings of comfort and relaxation, while a bright, harsh light can create a more energetic vibe.
Additionally, studio lights are incredibly versatile. They can be used for various purposes, from product photography to video creation and even live streaming. My friend Mike, who is a budding YouTuber, found that investing in a set of studio lights allowed him to elevate his production quality dramatically. The flexibility to control lighting conditions means you can adapt to different scenarios, ensuring that your work always looks its best.
Choosing the Right Studio Lights
Choosing the right studio lights is crucial for achieving your desired results. Start by assessing your individual needs—what type of activities will you be using the lights for? If you’re primarily into portrait photography, softboxes might be your best bet, while videographers may prefer LED panels for their adjustable brightness and color temperature.
Consider the size of your space as well. If you have a smaller area, compact lights can work wonders without overwhelming the space. Additionally, think about your budget; there are quality options available at various price points, so it’s possible to find something that meets your needs without breaking the bank. My friend Laura, who recently started a photography business, shared how researching different types of lights helped her make an informed decision, ultimately leading to better outcomes in her shoots.
Setting Up Your Studio Lights
Setting up studio lights for optimal results requires careful consideration of positioning, angles, and light intensity. Start by determining the primary light source, which is often referred to as the "key light." This light should be placed at an angle to your subject to create depth and dimension. You can then add fill lights to soften shadows and backlights to create separation from the background.
Pay attention to the intensity of your lights as well; too much light can wash out your subject, while too little can lead to an underexposed image. Experimenting with different setups will help you understand how light interacts with your space. I remember the first time I set up lights for my own projects—it took some trial and error, but eventually, I found the perfect arrangement that made my photos pop!
Maximizing Creative Potential with Studio Lights
Studio lights hold transformative power in enhancing both professional and personal spaces. They can turn mundane settings into vibrant arenas of creativity, allowing you to capture the magic in every moment. Whether you're a seasoned professional or just starting, understanding your lighting needs and exploring your options can lead to remarkable improvements in your work. So take the plunge, invest in quality studio lights, and watch as your creative projects come to life!
As you embark on your journey to elevate your lighting game, take the time to experiment and find what works best for you. The world of studio lights is vast and exciting—embrace it, and let your creativity shine!